In the world of photography, the allure of professional-looking images is irresistible. One of the most coveted effects is the “DSLR blur,” also known as bokeh, which isolates the subject from the background, creating a stunning visual impact. Fortunately, you don’t need a high-end DSLR camera to achieve this effect.
With the PicsArt app, you can give your photos that sought-after DSLR blur using just your smartphone. This comprehensive guide will walk you through the steps to create a DSLR Blur Using PicsArt.
Understanding the DSLR Blur Effect
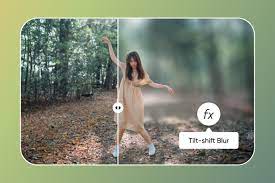
Before diving into the tutorial, it’s essential to understand what DSLR blur is and why it’s so appealing. DSLR blur, or bokeh, is characterized by a sharp subject in the foreground against a softly blurred background. This effect draws the viewer’s attention to the subject, enhancing the photo’s overall aesthetic. It is achieved through a combination of wide aperture settings, large image sensors, and high-quality lenses in DSLR cameras.
DSLR Blur Using PicsArt
PicsArt is a powerful, user-friendly photo editing app available for both Android and iOS devices. It offers a wide range of tools and features that allow you to manipulate and enhance your photos creatively. One of its standout features is the ability to simulate DSLR blur, making it accessible to anyone with a smartphone.
Key Features of PicsArt:
- User-friendly Interface: Easy to navigate, even for beginners.
- Advanced Editing Tools: Includes tools for applying filters, adjusting brightness, contrast, and more.
- Customizable Effects: Allows you to fine-tune effects to suit your style.
- Community and Inspiration: Access to a vast community of creators and endless inspiration.
Step-by-Step Guide to Achieving DSLR Blur with PicsArt
Now, let’s get into the step-by-step process of creating the DSLR blur effect using PicsArt.
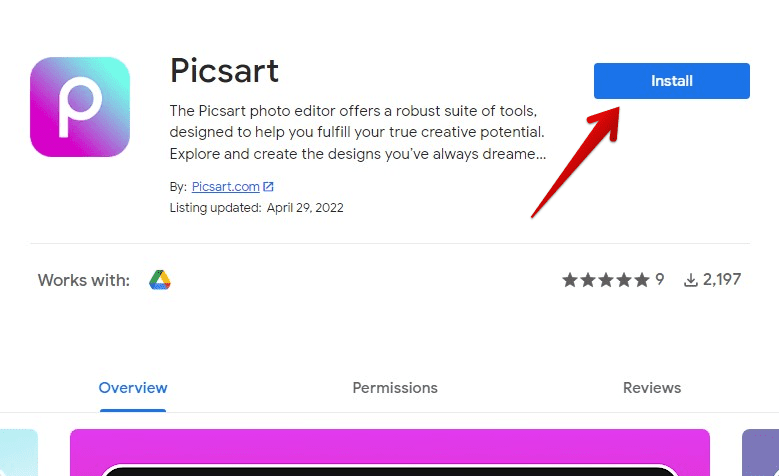
Step 1: Download and Install PicsArt
First, ensure you have the PicsArt app installed on your smartphone. If you haven’t already, you can download it from the Google Play Store for Android or the App Store for iOS.
Step 2: Open the Image in PicsArt
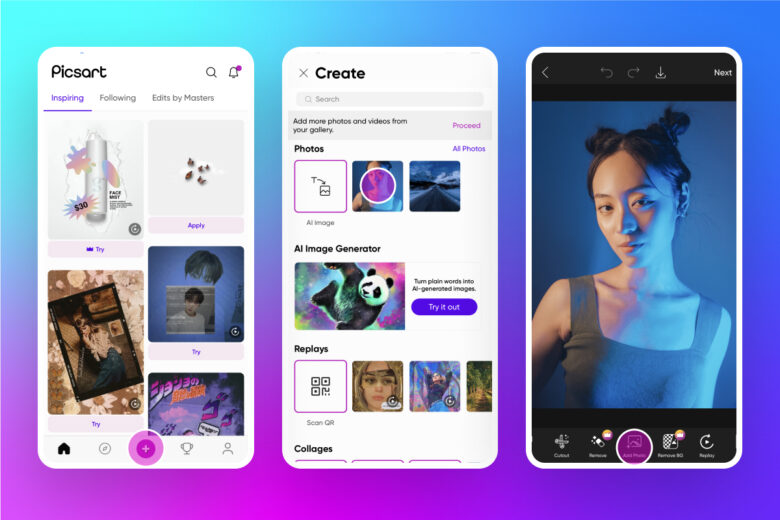
- Launch the PicsArt app.
- Tap the “+” button at the bottom of the screen to open your gallery.
- Select the photo you want to edit. Ideally, choose an image with a clear subject and a less busy background to achieve the best results.
Step 3: Access the Effects Menu
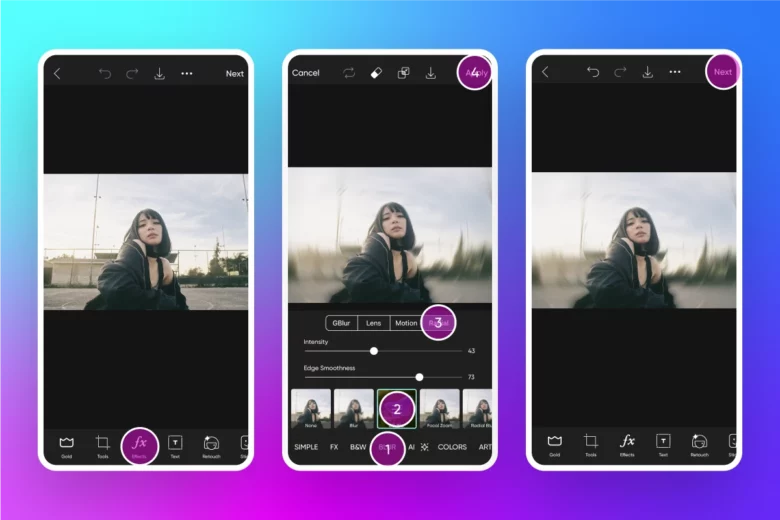
- Once your image is open, tap the “Effects” button, usually represented by a magic wand icon at the bottom of the screen.
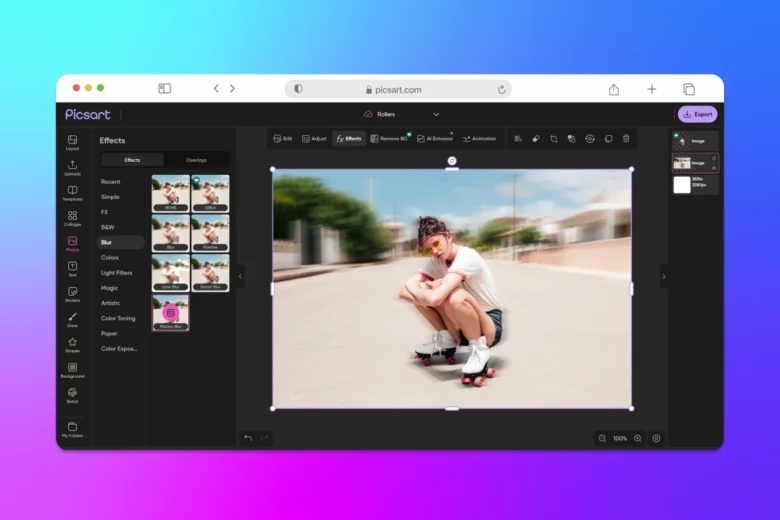
- This will open a menu with various effect options. Scroll through the options until you find the “Blur” category.

Step 4: Apply the Blur Effect
- Within the “Blur” category, you’ll find several blur options. The most commonly used for achieving DSLR blur are “Lens Blur” and “Motion Blur.”
- Select “Lens Blur” for a more authentic bokeh effect.
Step 5: Adjust the Blur Settings
- After selecting “Lens Blur,” you’ll see a circle on your image. This circle represents the area that will remain in focus.
- Adjust the size and position of the circle to cover the subject you want to keep sharp. Everything outside this circle will be blurred.
- Use the slider to increase or decrease the intensity of the blur effect.
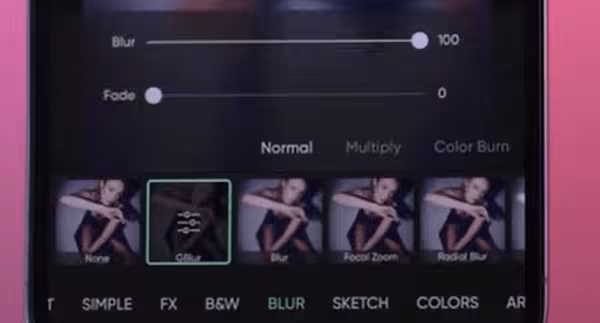
Step 6: Refine the Blur Effect
- To achieve a more professional look, tap the “Erase” option. This allows you to refine the edges of your subject manually.
- Use your finger to erase the blur from areas that should remain sharp. This step requires some patience but significantly enhances the overall effect.
Step 7: Save Your Edited Image
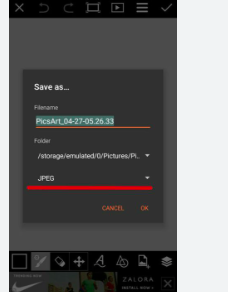
- Once you’re satisfied with the blur effect, tap the checkmark to apply the changes.
- Finally, save your edited photo by tapping the download icon or the “Save” button.
Tips for Perfecting the DSLR Blur Effect
Achieving a natural and convincing DSLR blur effect takes practice. Here are some additional tips to help you perfect your edits:
1. Choose the Right Photo
- Select images with a clear subject and a background that can be easily blurred without losing context.
- Avoid overly complex backgrounds, as they can make the blur effect look unnatural.
2. Use High-Resolution Images
- Higher resolution images provide more detail, making it easier to refine the blur effect.
3. Pay Attention to Edges
- Take your time when refining the edges of your subject. Sharp edges will make the blur effect look more realistic.
4. Experiment with Different Blur Types
- While “Lens Blur” is great for most photos, don’t hesitate to experiment with other blur types like “Motion Blur” for dynamic effects.
5. Use Additional Editing Tools
- PicsArt offers various other editing tools. Use features like brightness, contrast, and color correction to enhance your photo further.
Common Mistakes to Avoid
While editing photos, it’s easy to make mistakes that can detract from the final result. Here are some common pitfalls to watch out for:
1. Overdoing the Blur
- Too much blur can make the image look unnatural. Aim for a subtle effect that mimics a real DSLR camera.
2. Ignoring the Foreground
- Ensure the foreground elements that should be in focus are not accidentally blurred.
3. Skipping Edge Refinement
- Failing to refine the edges of your subject can result in a halo effect, making the blur look artificial.
4. Using Low-Quality Images
- Low-quality images can appear pixelated when edited. Always use the highest quality images available.
5. Inconsistent Lighting
- Ensure the lighting in your image is consistent. Inconsistent lighting can make the blur effect look out of place.
Advanced Techniques for Achieving DSLR Blur
Once you’re comfortable with the basic process, you can explore more advanced techniques to enhance your DSLR blur effect.
Combining Multiple Blur Effects
- Experiment with combining different blur effects to create a unique look. For instance, using both “Lens Blur” and “Motion Blur” can add depth to your image.
Using Layer Masks
- PicsArt allows you to use layer masks for more precise editing. This can be particularly useful for complex images where you need more control over the blur effect.
Adding Bokeh Lights
- To enhance the bokeh effect, you can add bokeh light overlays. PicsArt has a variety of overlays that can simulate light bokeh, adding a magical touch to your photos.
Customizing Blur Shapes
- Some advanced users might want to experiment with customizing the shape of the blur. This can be done using external tools and then importing the edited image back into PicsArt for final touches.
Combining PicsArt with Other Apps
- Sometimes, combining the strengths of different photo editing apps can yield better results. Consider using PicsArt in conjunction with apps like Snapseed or Adobe Lightroom for more comprehensive edits.
Conclusion
Creating a DSLR blur effect using PicsArt is a fantastic way to enhance your photos and give them a professional touch. With practice and experimentation, you can master this technique and apply it to various images, making your photos stand out on social media and beyond. Remember to start with high-quality images, pay attention to detail, and don’t be afraid to experiment with different settings and effects.
Whether you’re a beginner or an experienced photo editor, PicsArt offers the tools and flexibility needed to achieve stunning DSLR blur effects. So, grab your smartphone, open PicsArt, and start transforming your photos today!
